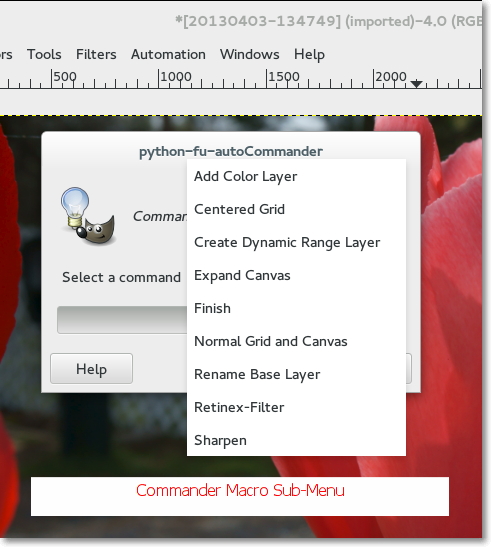
Let’s touch upon the main ideas that we are going to use to implement the macro recording and execution scheme that we can use to capture and run a set of commands.
- The command set will be read and parsed into a data structure. Each command set block will have a name and consist of commands and comments.
- The data structure will be read for a list of macro names. This list will be used to populate a GUI widget so we can select a macro by name.
- From the named Macro, the data structure will return a list of commands.
- The list of commands will be run in an ‘exec’ loop:
Example “Exec” Loop:
for Cmd in commandList:
    exec(Cmd)

Architecture
When you want to write a script to provide a single function, the common and obvious approach is to write a single in-line program, register the program, and provide a user interface if it is called for. Our Automation Example is multi-functional – more like a system, and we want to leave some of the functionality somewhat fluid. If we consider the system (data and code) and make good architectural choices we can accomplish our goal without making the code overly complex.
Execution Model
We will be breaking the execution of our automation functions into three different categories:
- User Interface Functions
- Base Class and Functions
- Pseudo Code
Let’s examine these categories briefly:
The User Interface Functions are the top level function that are activated from the menus. They are the ‘main’ function, the Registration Block, and the function that is registered in the Registration Block. We will be deliberately keeping the User Interface Function code sparse. While the UI Functions afford lot of functionality, they are rather fragile and difficult to debug. The approach we will use is to get the UI running and call a function that can be written and debugged independently minimizing the edits to the User Interface.
The Base Class and Functions are just normal python classes and functions that can be run from a shell. These functions do not depend upon the gimpfu library could be run in any python shell (including the Gimp-Python Shell).
- If you make a syntax error in the course of an edit, you want to be able to quickly isolate it to a particular line in a particular function. This is easier to do from the shell than when running the program from a GUI.
- Keeping the generic python code separate from the code that depends upon the gimpfu library minimizes the impact that future releases of gimp will have on the scripts. Because the gimp procedure calls are handled by Pseudo Code rather than the Base Class and Functions we have less risk of compatibility from future releases of Gimp within the Base Class and Function.
The Pseudo Code is the portion of the overall system functionality that we want to deliberately leave fluid. The functionality of the Pseudo Code is intended to be simple editing steps (which should cover a pretty wide range of edits).
- The types of things that you might do in Pseudo Code could include: copy layers, name layers, run filters, set layer modes, set layer opacity, merge layers, and run PDB functions. The pseudo code can access basic image characteristics and perform operations with them.
- Pseudo Code is simple Gimp-Python code fragments. Because there is no support for indenting, a simple test for how complex your Pseudo Code can become is whether you need to indent or not (note that you can write a simple ‘if’ statement on one line). In spite of this restriction we will show with some examples that you can accomplish quite a bit of editing with macros.
A final thing that we need to talk about that is not a ‘category’ of execution but is something that is an important part of our Execution Model is Scope. We are only going to touch on a couple of points that affect when lists are defined for dynamic User Interface selection.
- The Gimp User interface widgets allow you to select items from a list.
- You can specify the list within the widget, or pass the widget a list by name IF you define the list outside of the function being called. The list must be defined at the level of the function main().
- By keeping the scope of the User Interface lists at the top level, we are able to use the list name in both the user interface and in the function being called. In this way we can use the actual argument being selected rather than its index position in a list.
- An architectural advantage is we create this list with a function that reads a configuration file. We only have to define and maintain this configuration list in one place within our system and use the resulting list in as many places as we want by calling a reading function. This is how we will get new macros to show up in the menus when we add them.
- The following skeletal code fragments illustrate defining a list ‘cmdList’ at the top level – ‘main’, and using it within the registration block and function. Because it is defined at the ‘main’ level, we can reference it within the function and registration block. We can recover the argument from the index (passed by the widget) because we are using the same list in both places:
Example - Lists and Scope in Functions
cmdList = cmdrReadObj.CommanderMacros()
#
def autoCommander(theImage, cmdListIndex):
    ...
    commanderName = cmdList[cmdListIndex]
    ...
#
register (
    "autoCommander",         # Name registered in Procedure Browser
    ...
    [
    ...
    ( PF_OPTION, "cmdSet", "Select a command", 0, cmdList ),
    ],
main()
Data Model
We now need to talk about the form and organization of the data that we intend to use. The way that we choose to organize our data can have a dramatic impact on the complexity of the functions that we need to write. In our case we can take advantage of a couple of somewhat more sophisticated data models to make the actual functions fairly straightforward. We will be using “trees” (Python ElementTree) andXML data.
Trees and XML Data
Python has several built in data structures such as dictionaries, lists to name a couple. A very powerful library structure that is well suited to our particular needs is a “tree”. A couple of the key features that make them well suited for our application are:
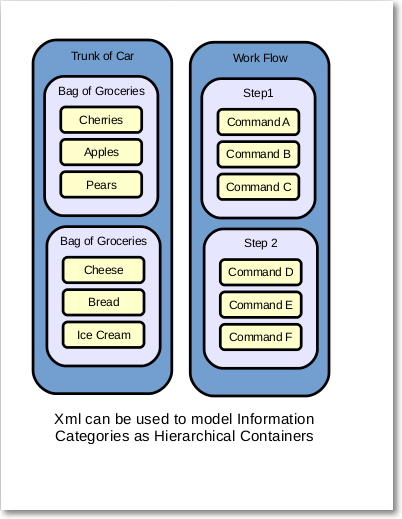
- Trees have a natural ‘hierarchical’ feel to them, kind of like a directory structure or the ‘folders’ of an operating system. The levels of hierarchy can be thought of as ‘containing’ the contents in the lower level.
- A branch can hold an indefinite number of elements, and those elements can be either a leaf with attributes or a sub-branch to another level. This lends a lot of flexibility with the way we structure of the data.
- The input / output format is XML, which is not only hierarchical, but it is text so it is human readable and portable to any platform (computer / OS).

The examples use ElementTree to read and write the data between trees and XML. ElementTree is included with Python and described in the Python documentation, so we will not go into detail about the mechanics of tree structures here.
You might be wondering at this point where these XML file will be located. The functions that read and write the XML files are expecting to find the XML under a directory named ‘myXml’ which you will have to create under you user gimp directory. If you are using Linux and your home directory is ‘stephen’ the path would look something like:
/home/stephen/.gimp-2.8/myXml
If you are using Windows the path would look something like:
C:\Users\stephen\.gimp-2.8\myXml
We will be dealing with a couple of types of pseudo code and xml files, and those will be keep in separate directories under myXml, but we will get to that in a bit.

لا ترحل قبل إضافة تعليقك هنا - نحترم الانتقاد البناء والكلام السيء مردود على صاحبة
EmoticonEmoticon