Macro Implementation – Revisited
Now that we have talked about the execution model and data model, we can revisit the “Implementation – In Broad Strokes” and tie the steps to the code that is handling them.
Pseudo Code to XML
Our first item was to read the pseudo code and parse it into a data structure. That data structure is going to be a Tree.
We can begin writing a pseudo code file by copying and pasting a set of commands from the gimp python console into a text file whose name ends in “.def”. The “>>>” preceding each command will be the “keyword” to indicate a command.
The pseudo code will be in a file, in this example it is named NormalGridCanvas.def. Each line begins with a keyword. Keyword choices are: “commander>”, “macro>”, “comment>”, or “>>>”.
The class XmlGenerator() in autoBase.py contains a function GenCommanderXml() which reads all of the *.def files in ~/.gimp-2.8/myXml/commander, inserts the lines into a tree (after removing the keyword), and then writes the tree out to a file named combinedCommander.xml.
The keyword will determine both the “tag” associated with the line of pseudo code, and whether it is a “branch” element (macro name) or a “leaf” element (command or comment). We are assigning both a definition and a level in the hierarchy for each line of pseudo code text as we read it into the tree.
Example - Pseudo Code Example - NormalGridCanvas.def
commander>Normal Grid and Canvas
   macro>
      comment>Shrink the Canvas back to fit the layer
      >>>theImage.resize_to_layers()
      comment>Set grid to origin and size = image
      >>>pdb.gimp_image_grid_set_offset(theImage, 0, 0)
      >>>pdb.gimp_image_grid_set_spacing(theImage, theImage.width, theImage.height)
After all of the *.def files are read into the tree and written back out in the form of an XML file, the formatting is done. Writing out a tree automatically generates all of the containing enclosures, essentially making properly formatting the XML a trivial task. The fragment from combinedCommander.xml illustrates the XML from the pseudo code in NormalGridCanvas.def.
Example - combinedCommander.xml (fragment)
<combined>
  Definition
 ...
  <commander>
    Normal Grid and Canvas
    <comment>
      Shrink the Canvas back to fit the layer
    </comment>
    <command>
      theImage.resize_to_layers()
    </command>
    <comment>
      Set grid to origin and size = image
    </comment>
    <command>
      pdb.gimp_image_grid_set_offset(theImage, 0, 0)
    </command>
    <command>
      pdb.gimp_image_grid_set_spacing(theImage, theImage.width, theImage.height)
    </command>
  </commander>
  ...
</combined>
* The XML above was run through an online XML pretty printer for readability. The XML from ElementTree is functional, but hard to read.

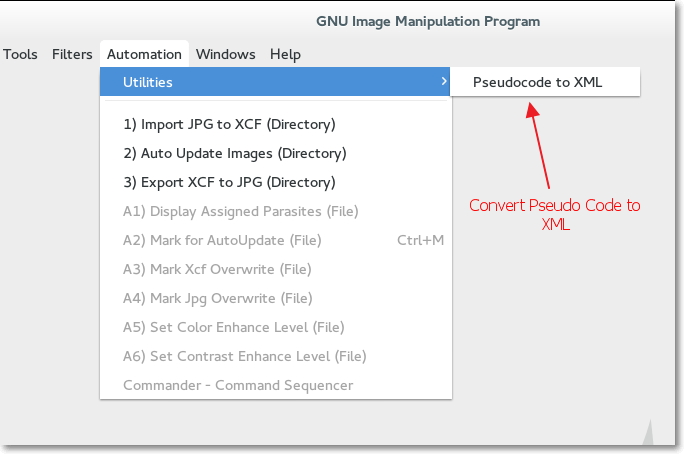
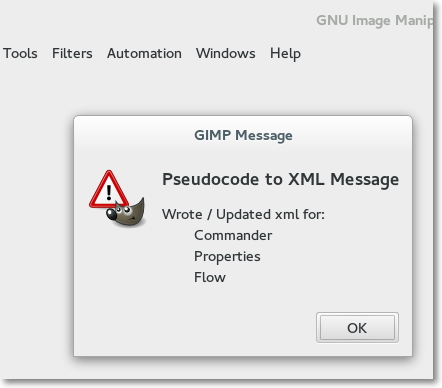
The Xml generator can be called from a GUI menu.

Displaying the Macro Names in a Menu
In our discussion of Scope in the Section “Execution Model”, we showed an example code fragment where we created a list “cmdList”. The code was from the example autoCommander.py and uses a class BaseXmlReader and the function CommanderMacros() which resides in autoBase.py.
- The list of Macro Command Names is created by loading the XMLfile combinedCommander.xml into an ElementTree.
- The tree is traversed at the branch level (the tag
), and the branches text which are the names of the macros are built into a list. The list is essentially built with a “for loop”. - The list is passed to the widget and used to select the macro you want to use.
Running a Specific Macro
The final point to expand upon is how we fetch and run the specific set of commands for a selected Macro.
- We can derive the name of the Macro by way of the menu selection (registration block of autoCommander.py).
- We will again use the BaseXmlReader class, but this time we will utilize the CommanderExtract function passing the Macro name as an argument. The CommanderExtract function traverses the tree branch by branch as before when we were gathering the names of the Macros, except it is comparing the names against the passed argument as we go. When the CommanderExtract function finds a branch matching the argument, it drops down a level to read the leaf elements under that branch.
- The leaf arguments whose tags are set to “command” are appended to the list that will be returned for processing. The leafs whose tags are “comment” will be ignored.
- The newly created returned list will be run through in a “for loop” which will process each line as a separate command using the python “exec” function.
The variable ‘theImage’ is defined with the autoCommander function and can be used as a handle to access information about the active image by the Macro commands.
Commander Macros – Summary
The discussion above has described how we can generate a macro by running a set of commands in the Python Console, paste those commands into a text file adding a name and comments, and then making it available for use.
The code for transforming the pseudo code into a macro is in autoWriteXml.py. The code to display the menu of Macros you have written and execute them is in autoCommander.py. The Classes referenced by these two scripts are in autoBase.py.
The text files that you write for your macro definition need to be put in a directory ~/.gimp-2.x/myXml/commander and have an extension of ‘.def’. Create a separate *.def file for each macro.

لا ترحل قبل إضافة تعليقك هنا - نحترم الانتقاد البناء والكلام السيء مردود على صاحبة
EmoticonEmoticon